DIY Barbie Dream Doll House
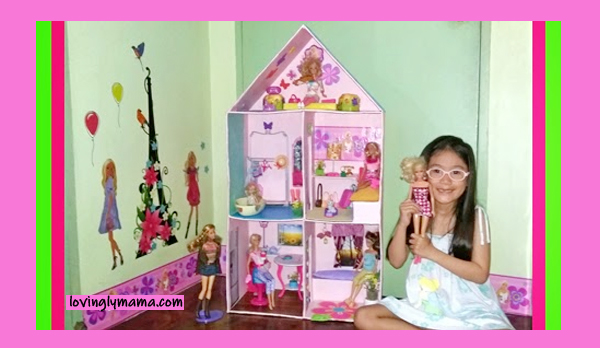
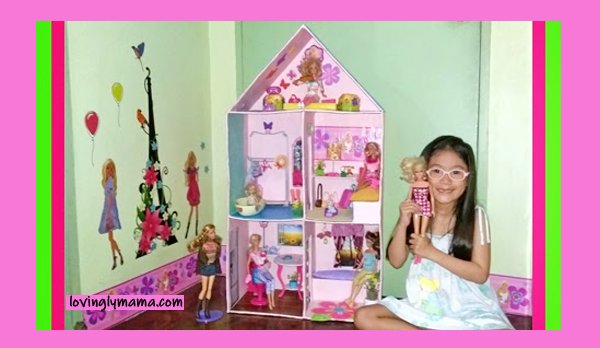
We like making things ourselves and one of the things that our team (mother and daughters) did is this DIY Barbie Dream Doll House.
Originally published: April 10, 2015
Summer Time
In our home, summer vacation officially started last February when Dindin finished her homeschooling PACEs. But it wasn’t only until late last month (March) that we thought of our perfect summer project–a DIY Barbie dream doll house. After all, we all love Barbie in the house.
The main color theme is pink and the motif is flowers and butterflies. It may not be Pinterest-worthy, but it sure did make my daughters happy. 😀
DIY Barbie Dream Doll House Details
- Doll house cost: Less than P500 and lots of love
- Construction time: About 4 hours including painting. The embellishment time will vary, depending on what you will add
Many of you know that Dindin has quite a collection of Barbie dolls, accessories, and doll furniture. But we don’t have a doll house. I went to the internet and looked for a doll house that I can order online and found one at Toys R Us USA.
Although it was cheap there at only $35, it would cost double if I have somebody buy it for me and ship it over to the Philippines. That was when I got the idea of making one. Not only will we be able to customize it, it was something that Dindin and I can do together, hence the bonding. It was our summer craft project.
I searched for the perfect used cardboard box but since it is already folded, it was hard to manipulate. My husband suggested that we buy an unused balikbayan box. And we got one at National Bookstore for a little less than P100. Thus was the foundation of our DIY Barbie Dream House.
Materials You Will Need:
- 1 Balikbayan Box
- Cutter and scissors
- Ruler
- Cutting Mat
- Pencil to mark the board
- 2 rolls of 2-inch Masking tape
- 1 roll of 1-inch Masking tape
- Glue gun and stick
- Elmer’s Glue
- Paint and paint brush
- Doll accessories and furniture
- Double-sided tapes, with foam and without foam

How to Make a Doll House
- Open up the cardboard box. Cut the biggest portion, which is 20″ x 27″.
- Measure and cut three pieces of cardboard box, 10″ x 27″ in length. These will be for the walls.
- Measure and cut three pieces of cardboard box, 10″ x 20″ in length. These will be for the floors.
- As for the roof, measure and cut two pieces of 10″ x 15″ cardboard box.
- Get 1 piece of the 10″ x 27″ and 1 piece of the 10″ x 20″. Form it into a cross shape and tape together. Put this on top of the biggest portion and tape them all altogether. Do not be stingy with the tape. Tape from end to end on all sides.
- Tape on the walls and floors. You should have the main body of the doll house by now.
- Attach the roof by forming a triangle on top and taping them to the body.
- Optional: Trace the shape of the roof on the remaining cardboard. Cut out the triangle and attach to the back as a wall to the attic. You may want to leave this part open though.
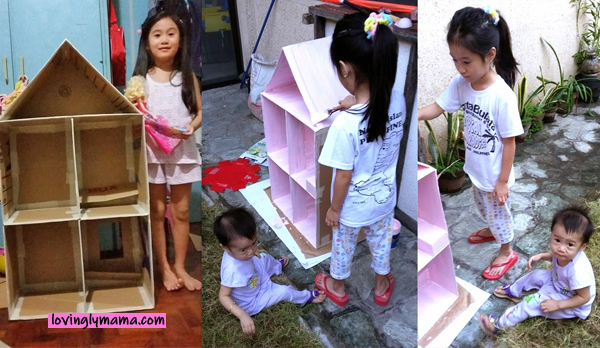
Left: That’s our assembled doll house. Right: Dindin paints the exterior in the garden while Shane the toddler looks on (most of the time, at least). - Start painting. We used the Davies Elastomeric Odorless Paint. They have baby pink available so we no longer needed tinting. We bought 1 quart because it was the smallest size, but we only used half of it. You may also want to use poster paint, but I found it too expensive. Latex was the cheapest option. I painted the inside part while Dindin did the exterior. Proud to say, Dindin did a better job than me. haha
- Let it dry for at least six hours outdoors before bringing it inside your bedroom.
Embellish and Decorate Your Doll House
Now you are ready for the interior design of your doll house. Our house now looks like plain pink candy. So here’s what we did.
Assign Parts of the House
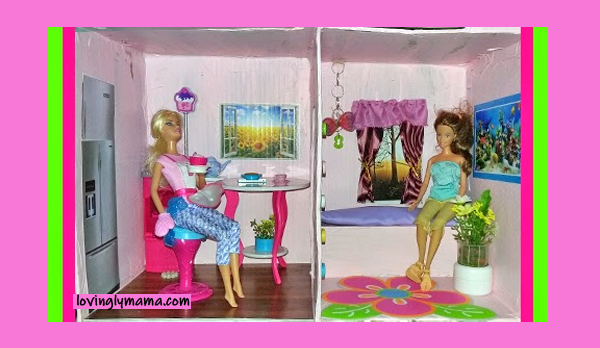
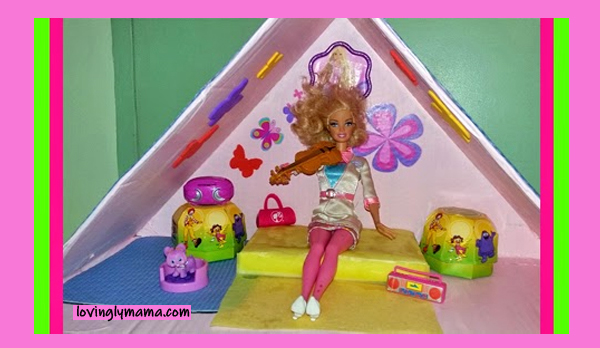
We assigned parts of the house. For the lower part, we had the living room and kitchen. For the second level, we decided that it is where the bedroom and the bathroom are going to be. We had a problem with the attic because we couldn’t seem to decide what to do with it. Finally, it became Barbie’s music room.
Exercise Your Creativity
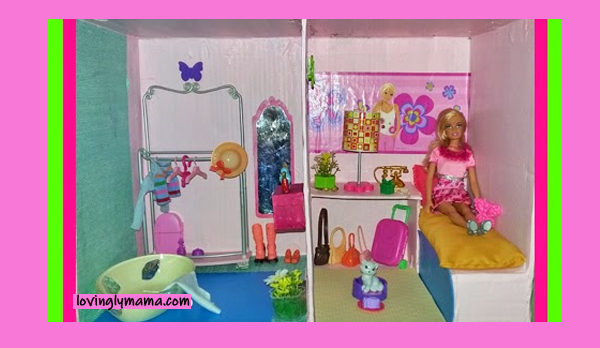
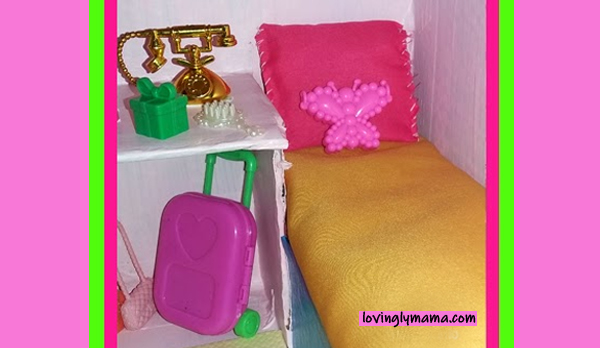
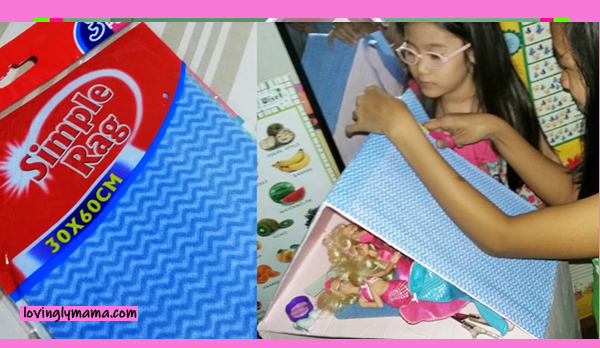
Just like in your own home, exercise your creativity in decorating your doll house. In our case, I constructed a built in bed and sofa for Barbie made of cardboard, so we painted it along with the house. However, I did make cushions for the sofa and the bed, as well as a pillow, to add more color. With each addition, Dindin would squeal, “Perfect Mom!”
Use Different Kinds of Doll Furniture
Over the years, we have collected many accessories and doll furniture because of the many dolls that Dindin has. Some of them are not Barbie stuff. We also have those dolls that you can buy from China goods store.
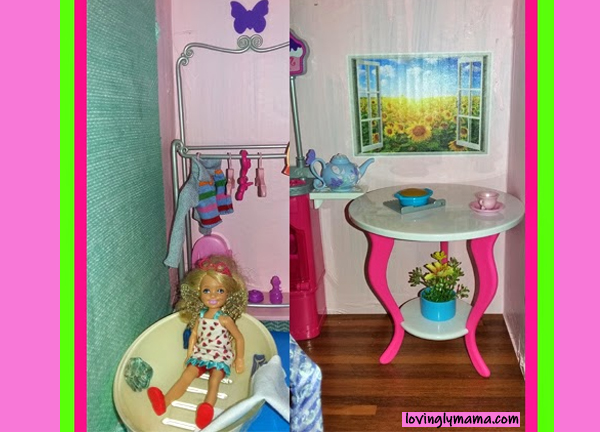
Right: The dining table with a potted plant at the bottom and an open window showing a sunflower patch.
They have really nice accessories, like our little gold telephone. We have kept them all…or at least 95% of them. So we had a lot of choices in terms of what to add to the different rooms of our doll house. But we did buy the bath tub and the plastic flowers.

Contribution of Friends
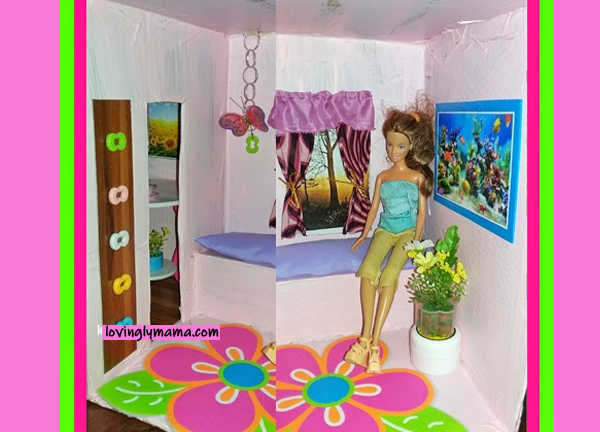
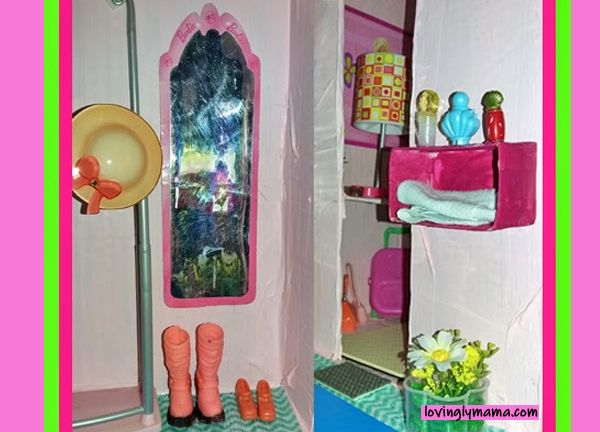
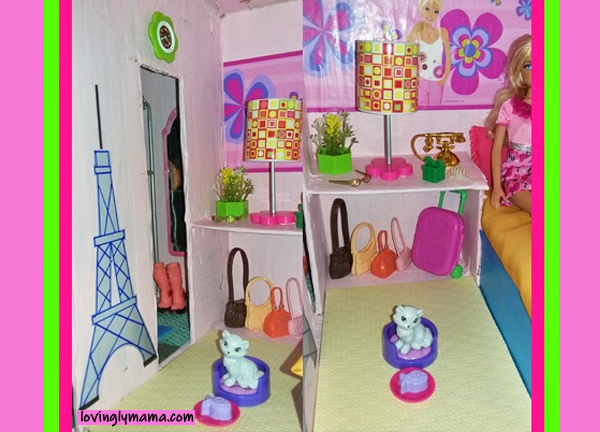
After I posted our work online, a couple of mommy friends also made doll houses for their daughters. They also used the balikbayan box. And I am sharing their photos here with permission. As you can see, you can choose the colors that you want and put in the accessories that you have. No need to buy extra stuff really. You can use whatever is available.
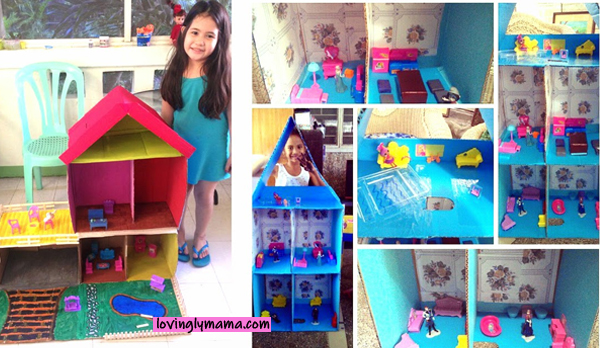
Right: Ella’s shabby chic house with different doll sets, made with her mom. Dr. Maritel Ledesma. Thank you very much for sharing your pictures. 😀
Don’t Worry About the Craftsmanship
You may notice that our DIY Barbie Dream Doll House is not very straight or is it very neat in the corners. That is fine. You will realize that your daughter wouldn’t mind the workmanship.
For them, it is the fact that you have given their dolls a home. And also that you did something together– a mother-daughter bonding.
Now, Dindin maintains her dollhouse by turning it every night to face the wall so that it will not gather dust. She also uses a static brush for the computer as a broom to clean up the place. I think it is a cool way to teach responsibility at the micro level. Another activity while homeschooling in Bacolod.
How the Toddler Contributed
You may remember that Dindin has a sister. So what did the toddler do?
Well, we made the doll house while our toddler is almost always sprawled on the cardboard while we were cutting. But that was part of the fun. Even Dindin sat and laid on the cardboard from time to time. I guess for them it looked like an attractive mat for a lazy time.
Reminders
Here are some reminders to keep this a fun activity for all of you involved.
- Just be careful with the cutter and scissors.
- Do not be so serious in making it.
- Always keep in mind that you are making it for your kids and not for yourself.
- Do not mind the intermissions and the occasional tornado that the toddler brings.
- Sometimes, you have to do some things all over again.
- Don’t lose your cool if you keep on getting interrupted while you are indulging your creativity.
- Our project took days to finish because we could not work on it for hours on end.
- Almost always something comes up. The important thing is, you are all working together and having fun.
If you are a working mom though, working time may take longer because you only get to work on weekends. Unless of course, you will take a leave and use it to build this project. 😀
The SuperMom
Almost to the end of our project, Dindin told me, “You are my Super Mom. You made me a beautiful doll house and I love it!” So this doll house is worth it. Have fun making yours! 😀

You are an awesome Mom! That is a very nice project Marz. Good job everyone especially to Mommy!!
This is awesome! I wish I had a doll house growing up. Even until now, I still love them and would admire them 🙂 Din-Din’s doll house is made out of love and so many delightful details 🙂
Looking back, I wish I made for myself Gem. haha Who would’ve thought that I could do this? LOL
thanks for including “our” dollhouse, Sigrid and for inspiring us to make one. yes indeed, you are a supermom!
oh my gosh!!! I sooo love that doll house!! How i wish i have that talent like yours mommy!! Sooo intricately done, specially the individual rooms, the minis..sooo cute! Thumbs up !
Thank you Marz Pynky. 😀
This is WAY cool! 🙂 Surely a great way to bond, and teach kids a bit of responsibility. I’m too old for a doll house, wish I could have done one for myself when I was younger. Haha. Don’t think my husband will want to do this for my 2 boys but maybe next time..
Hihihi For your next kid perhaps?
Whoaa…what a craft for a family bonding with the kids…..superb!
I really admire you Moms. You get to make beautiful projects (like this) with your lil kiddos knowing na kaliwa’t kanan ang ginawa mo everyday, and without yaya pa ha. 🙂
When I was in my younger years, I’m very creative and I’m always active when it comes to project making, but now.. I don’t know what happened. Katamaran I guess? Hehe. When kaya ako saniban ng kasipagan? Hehe. 😀
Good job, Team Ye-LO! 🙂
Do it with Kimy, moms. She will really love it! 😀
Lovely DIY craft, Great instructions. I wish I could also make something like this. Creating is so therapeutic.
This is such a good idea! We loved it. It is amazing how you transformed a box into doll house. Great idea! For sure I’ll share.
What a great idea! I bet the kids appreciate the Barbie doll house more, having made it themselves!
I am so sad I did not know about this when my kids were young. There is no doubt in my mind that we would have made this and customized it as well. What a great idea for a doll house for little girls.
This is an amazing idea! I always wanted a Barbie’s house, one of my friends had this very expensive one. But now you have showed me that it can be done at home if we just get a little creative and handy with simple materials.
This is very impressive! I love how creative you were in putting this together. Thanks for sharing your project, it definitely inspires me to do something like this.
how cute is this! this doll house is way too intricate. a great way to bond with your daughter as well!
That doll house looked fantastic. It was better decorated than my own home. LOL I love that idea. And I am sure the memories you will have with your girls, is priceless. Great Job!!
Thank you! Yeah, Barbie’s rooms look much better than our house as well. hahahaha
Oh my goodness, I love this so much! The Barbie doll house is so much more special because she helped make it! I want to do this with my daughter and her friends!
I’m the mother of two boys, so no pink in my house but for October rosa. This reminds me so much of my own childhood!
This is amazingly creative! It looks like so much fun building your own Barbie house than buying a ready made one. I always wanted one like these. Thanks for showing how easy it is! 😀
I absolutely love that this Barbie house is a DIY project. How awesome that your daughter helped as well. I can’t wait for my daughter to get older so we can do things like this. I’m saving this for the future because I can see my daughter and I doing this. It turned out so beautiful! Awesome job!
Oh I love this idea! Definitely the more affordable alternative than buying a doll house. Plus, it’s just so rewarding to be able to make something like this. 🙂
What a great idea summer activity! The building of the house is also a great family project. Plus you get to save on buying a doll house.
I am going to follow this to make a kitchen for my son. He has been asking for it.
I am really impressed by this DIY doll house. My daughter would have loved this when she was younger. And I love how amazingly close to the one we ended up buying. Looks awesome!
Wow this DIY doll house is absolutely adorable! You post reminds me of my story about a Mom who made a DIY Cardboard kitchen for her daughter.
Such a great bonding time for you. Being a Mom forces you to be more creative and savvy.
Only pure love can inspire great things like this. I can see strong bond between you and your daughters. I can suggest it to my friends also now.
Omg! I love this! So impressive, love the finished products it looks like a real doll house that you can buy in a toy store 😍
Nice bonding to with the kids Mommy..Ang Saya yung excited ka habang binubuo yung Doll House..How I wish I have a daughter too hehehe..Ang Ganda nito.
Good job. Mommy Sig. Ang gaNdang Dollhouse. The girls is happy. Ang cute ni Siobe. Ang liit liit pa. At halos kasing height lang ni Achi Yung Diy Doll house Nila. 😍
haha nakita mo to ha. galing!